7 Pinterest Traffic Strategies You Should Be Using Now |  |
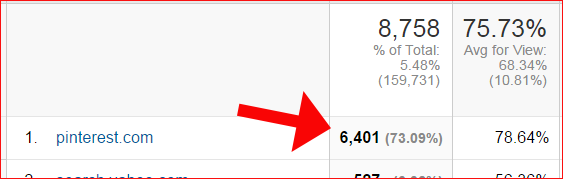
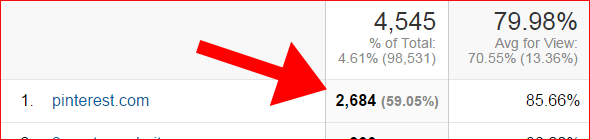
| 7 Pinterest Traffic Strategies You Should Be Using Now Posted: 29 Jun 2015 05:45 AM PDT The traffic to my natural hair site just keeps growing and Pinterest is a big part of it. It’s only 5% of the total views, but it’s passive, targeted and viral traffic! Last month, over 6400 views came from Pinterest. That’s almost three times as many people as this time last year. For the last few days, my daily views from Pinterest has been in the 300’s, so I should break that record by a lot in July. And in case you’re wondering, people who come from Pinterest stay on my site for about 2 minutes. So it’s relatively sticky traffic, and not traffic that instantly bounces. I know this may not be the case with all sites, so that’s why you have to experiment. So here are some tips to rev up your traffic from this awesome network.
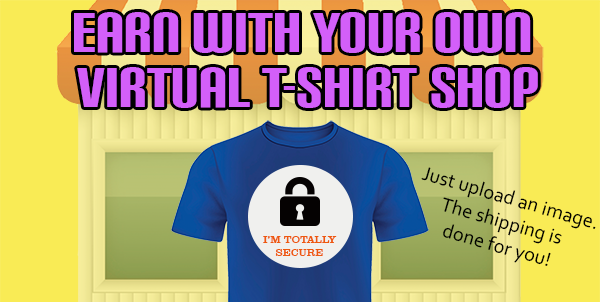
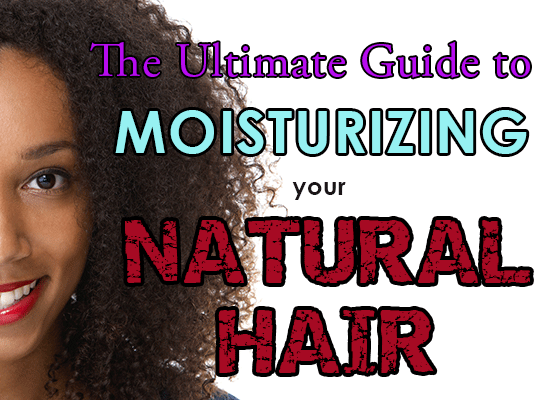
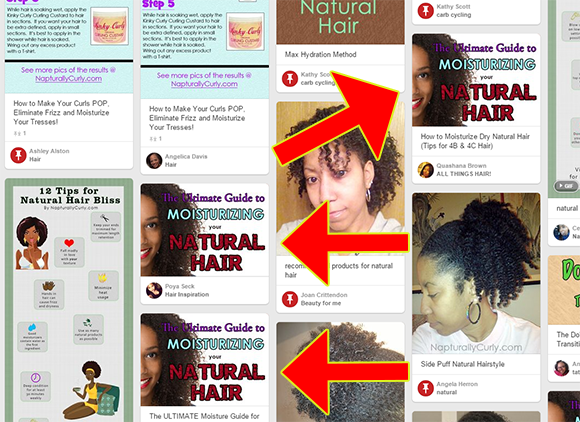
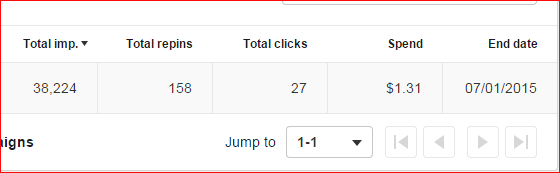
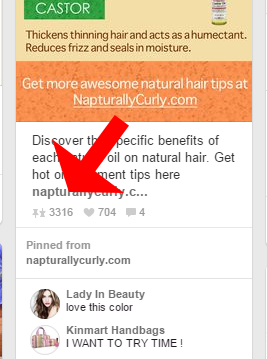
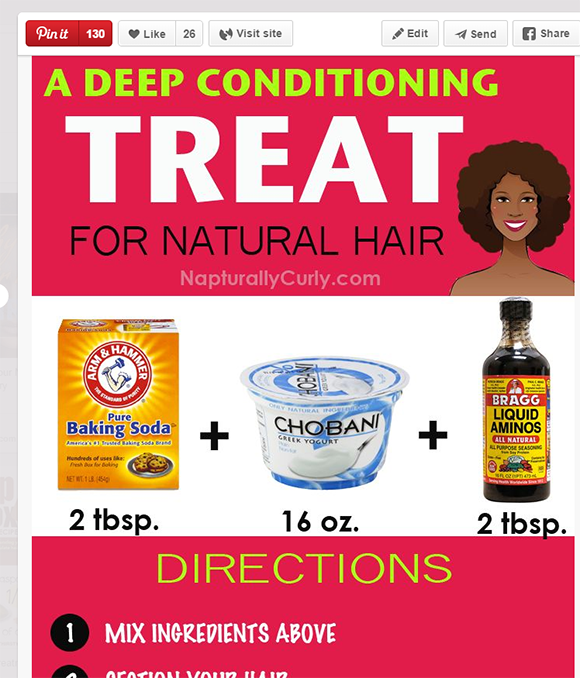
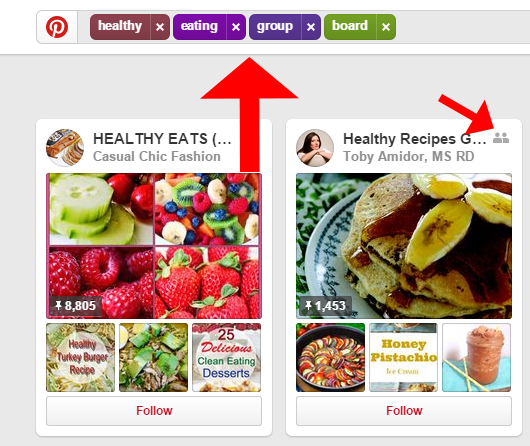
1) Refresh Your Images!With free programs like Canva, there’s absolutely no reason your images should look crappy. Improving them will increase your exposure because people love to re-pin attractive images. What’s funny is the article linked to the image could be absolute trash (many people don’t even check the link), but they will still pin the image just because they love the picture. That’s how visual we are! I create my images with Photoshop (take my course here), but if you don’t have it, there are tons of other free places to create awesome images. I have been on Operation Image Update and have refreshed some pages with better looking images. For example, here’s one of them…. And if you look at my site re-pins from other Pinterest users below, you can see that people are sharing the image quite a bit — much more than the old one. By the way, you can see your site’s re-pins by going to pinterest.com/source/yoursite.com. Here’s another one I recently created… I chose the text-inside-a-circle effect because that seems to go over well, and gives the image a modern look. 2) Consider Pinterest Ads While They Are Super CheapI have never been a fan of paid ads because I always get a terrible return on my investment (until my recent Teespring Facebook campaign that I will be blogging about!) Anyway, if you’ve got a popular image or one that you THINK will be popular, you can choose to promote it using Promote Your Pins. I am promoting a pin that links to one of my natural hair shirts. The ad has been running for the last 8 days and here are the results… Now, those numbers aren’t outstanding by any means, but the stat I am watching (in addition to clicks, of course) is the number of re-pins (shares). Re-pinning over time is the key to viral traffic with Pinterest. So I’m paying .0485 cents per click and .00829 cents per re-pin/share. I’ll explain in a sec why re-pins are the keys to long-term traffic with Pinterest. Now there is a downside to my ad. Because I’m promoting a Spreadshirt affiliate link, there is no way to track if the sales to this shirt are coming from this ad, BUT because I’m literally paying way less than one cent per engagement, I’m OK with that. Normally I wouldn’t recommend paid advertising without knowing your exact return on investment (and I STILL don’t if you are on a tight budget), but since ad prices are low, I’m OK with that. Let me know if you’ve tried Pinterest ads or plan to. Why RE-Pins Matter So Much!Look at the image stats below from one of my images… I didn’t run an ad on this image. This is all free, organic Pinterest action. So over 3,300 people have re-pinned/shared that image in the last 10 months. I have 3500 followers, so there’s no way that over 95% of them re-pinned this. They have come from my follower’s followers gradually over time. Only a small fraction of your direct followers will re-pin and drive traffic from what you pin. The real magic of Pinterest comes in when their followers being re-pinning. That means your image will be linked from hundreds of Pinterest boards with a clickable link to your page. That’s why it’s no coincidence that the images that generate the most traffic are ALWAYS the ones with the most re-pins. And because I’ve discovered the power of the re-pin, I don’t value a Pinterest account by the number of followers only. I look to see if people are re-pinning and sharing their images That shows you how engaged the followers really are. I’ve seen people with 5-digit followers but absolutely ZERO re-pins on everything they post. I’d much rather have fewer followers with steady re-pins than thousands of followers with no re-pins. 3) Use Bright ColorsI see this mistake all the time and not just on Pinterest, but on YouTube and Udemy thumbnails, or any place with a thumbnail or feed. Remember, most websites have white backgrounds with dark text. So if you create an image with those same colors, it doesn’t stand out nearly as much with an image that has red, orange, pink, etc. Now obviously you can’t control colors on existing images and photos, but if you are creating the image from scratch, you have full control. I use bright colors on most of my tip-o-graphics because I know it helps them stand out in the feed. 4) Post Step-O-GraphicsPeople seem to really love it when others post recipes or step-by-step instructions for how to do something all on one image. I need to do this more. Here’s one I created… You could also make a teaser by leaving off some steps and suggesting they click the image for the remaining steps. 5) Add Your URL to the DescriptionYes, images automatically link back to the website the image came from (or you can choose the link if you upload directly), BUT you can also add a link in the description that appears below the image AND it’s clickable. It’s amazing how many people don’t do this with their own images. You can use that space to create a teaser for the content behind the image. 6) Overlay a Pin It Button on Your ImagesDoing this has drastically increased my number of re-pins in the last two years. In my podcast about Pinterest, I suggested that you buy the same plugin I use, but my followers informed me that you don’t need a plugin. Pinterest already has this functionality built in and it’s easy to set it up. Check it out. All you do is copy/paste. 7) Use Rich Pins & Group BoardsThese are two techniques I haven’t experimented with yet, but I keep reading success stories about them — especially the group boards. Rich pins let you add meta data to your pins so you can provide additional info to the image. You have to have a business Pinterest account and you need to apply first. A group board is one where multiple people post to one board. So the exposure potential is greater if the participants have active followers of their own. Someone made an account of all the top Pinterest Group boards. So if you see one in your niche, you may want to try pinning to them. You can find group boards by searching keyword + group + board. The gray icon in the top-right corner of the board (see above image) signifies that it is a group board. Here’s a tip: Look for group boards that get re-pins regularly like this one. I wouldn’t bother with boards that have no engagement — no matter how many followers they have. Dear Pinterest Thieves: I See You!To those of you stealing my images and re-uploading them to your account, don’t think I don’t see them. The natural hair space is super small compared to other niches so I eventually see most of the Tom-thievery going on. I’m developing a plan to handle this, but all I have to say is….Karma’s a you-know-what! GRRRRRR! This is why I always add my site URL to any image I create now. Obviously it doesn’t deter everyone, but at least credit is given somewhere. It is NOT okay to just upload someone else’s image and link it to your page unless you want to be known as a thief. This whole it’s-on-the-internet-so-it-must-be-free-to-use mentality drives me mad. [sigh] OK, I just had to get that out. So what are you doing on Pinterest lately to help your site get more traffic? Anything to share? |


| You are subscribed to email updates from To stop receiving these emails, you may unsubscribe now. | Email delivery powered by Google |
| Google Inc., 1600 Amphitheatre Parkway, Mountain View, CA 94043, United States | |